If you can follow flat-pack furniture instructions, you can build a gaming PC. Modern parts only fit one way, most of the work is plugging cables into clearly labelled sockets, and the whole job usually takes an afternoon. The hard part is choosing compatible parts, and that's where most of this guide focuses.
This is a general guide. Every motherboard, case and cooler is slightly different, so your manuals always take priority over anything here. Forge PC has not built the specific example systems linked below. Facts about platforms and software are credited to their sources. Prices are approximate UK prices checked on 12 November 2026.
The short version
Choose a platform (AM4, AM5 or Intel) and check that every part matches it.
Check the physical fit: motherboard size, graphics card length, cooler height.
Check power: the PSU wattage and connectors your graphics card needs.
Build outside the case first: fit the CPU, memory, M.2 SSD and cooler to the motherboard on its box.
Install in the case, then the PSU, graphics card and cables.
First boot: be patient. AM5 systems can take 5 to 15 minutes to train memory.
In the BIOS: enable EXPO or XMP, check the drives, update the BIOS if needed.
Install Windows 11 from a USB stick, then graphics and chipset drivers.
Step 1: Choose parts that work together
A gaming PC needs seven parts: processor (CPU), motherboard, memory (RAM), graphics card (GPU), storage (SSD), power supply (PSU) and case. Some processors also need a separate cooler. If you want a ready-made parts list, start with our £800 or £1,200 build guides.
These three must match each other:
Platform | Processors | Motherboard chipsets | Memory |
|---|
AMD AM4 | Ryzen 5000 and older | B550, A520, X570 and others | DDR4 |
AMD AM5 | Ryzen 7000, 8000, 9000 | A620, B840, B850, X870, X870E (plus 600-series) | DDR5 |
Intel LGA 1700 | 12th to 14th gen Core | B760, Z790 and others | DDR4 or DDR5, depending on the board |
Intel LGA 1851 | Core Ultra Series 2 desktop | B860, Z890 and others | DDR5 |
DDR4 and DDR5 sticks are not interchangeable, so buy the type your board takes. On Intel LGA 1700, check the exact model name, because the same board can be sold in DDR4 and DDR5 versions. On AM5, AMD says every board works with every AM5 processor, but 600-series boards may need a BIOS update for Ryzen 8000 and 9000 chips. Our AM5 motherboard guide covers which chipset to choose, and DDR5 vs DDR4 explains the memory question.
Buy memory as a matched two-stick kit so it runs in dual channel. Our RAM guide recommends 32GB for a new build, with 16GB as the floor.
Does it fit?
Motherboard size: ATX, micro-ATX (mATX) or mini-ITX. Check that the case supports your board's size. Most mid-tower cases take all three.
Graphics card length: case listings give a maximum GPU length in millimetres, and card listings give the card's length. Leave some room for cables.
Cooler height: tower air coolers have a height, and cases list a maximum CPU cooler height.
Cooler socket support: check that the cooler supports your socket (for example AM5 or LGA 1851). Some processors, such as the Ryzen 5 5600 and 5500F, come with a cooler. Others, such as the Ryzen 5 9600X and X3D chips, don't.
Is the power supply enough?
Graphics card makers publish a recommended PSU wattage for the whole system. NVIDIA lists 650W for the RTX 5070 and 750W for the RTX 5070 Ti. AMD lists 650W for the RX 9070 and 750W for the RX 9070 XT. Treat these as a minimum for a quality unit.
Also check the connectors. NVIDIA says the RTX 5070 and 5070 Ti can use two 8-pin PCIe cables through the supplied adapter, or a single 300W PCIe Gen 5 cable. NVIDIA recommends a PSU compliant with the PCIe CEM 5.1 standard. The reference RX 9070 XT uses two standard 8-pin connectors. Partner cards vary, so check the listing for the exact card.
Storage
An NVMe M.2 SSD is the right choice for a gaming PC. Get at least 1TB, ideally 2TB. Our SSD guide explains why PCIe 4.0 is plenty for gaming.
A Phillips No. 2 screwdriver. A magnetic tip helps.
A clear table with good light. Avoid carpet if you can.
Cable ties or Velcro straps (many cases include some).
A USB stick of at least 8GB for Windows. Microsoft's creation tool needs at least 8GB.
Another computer to create the Windows USB stick and look up manuals.
Optional: an anti-static wrist strap. If you don't have one, touch the bare metal of the case or PSU every so often to discharge static.
Thermal paste usually comes pre-applied on the cooler, or in a small tube in the box.
Step 3: Build on the motherboard first
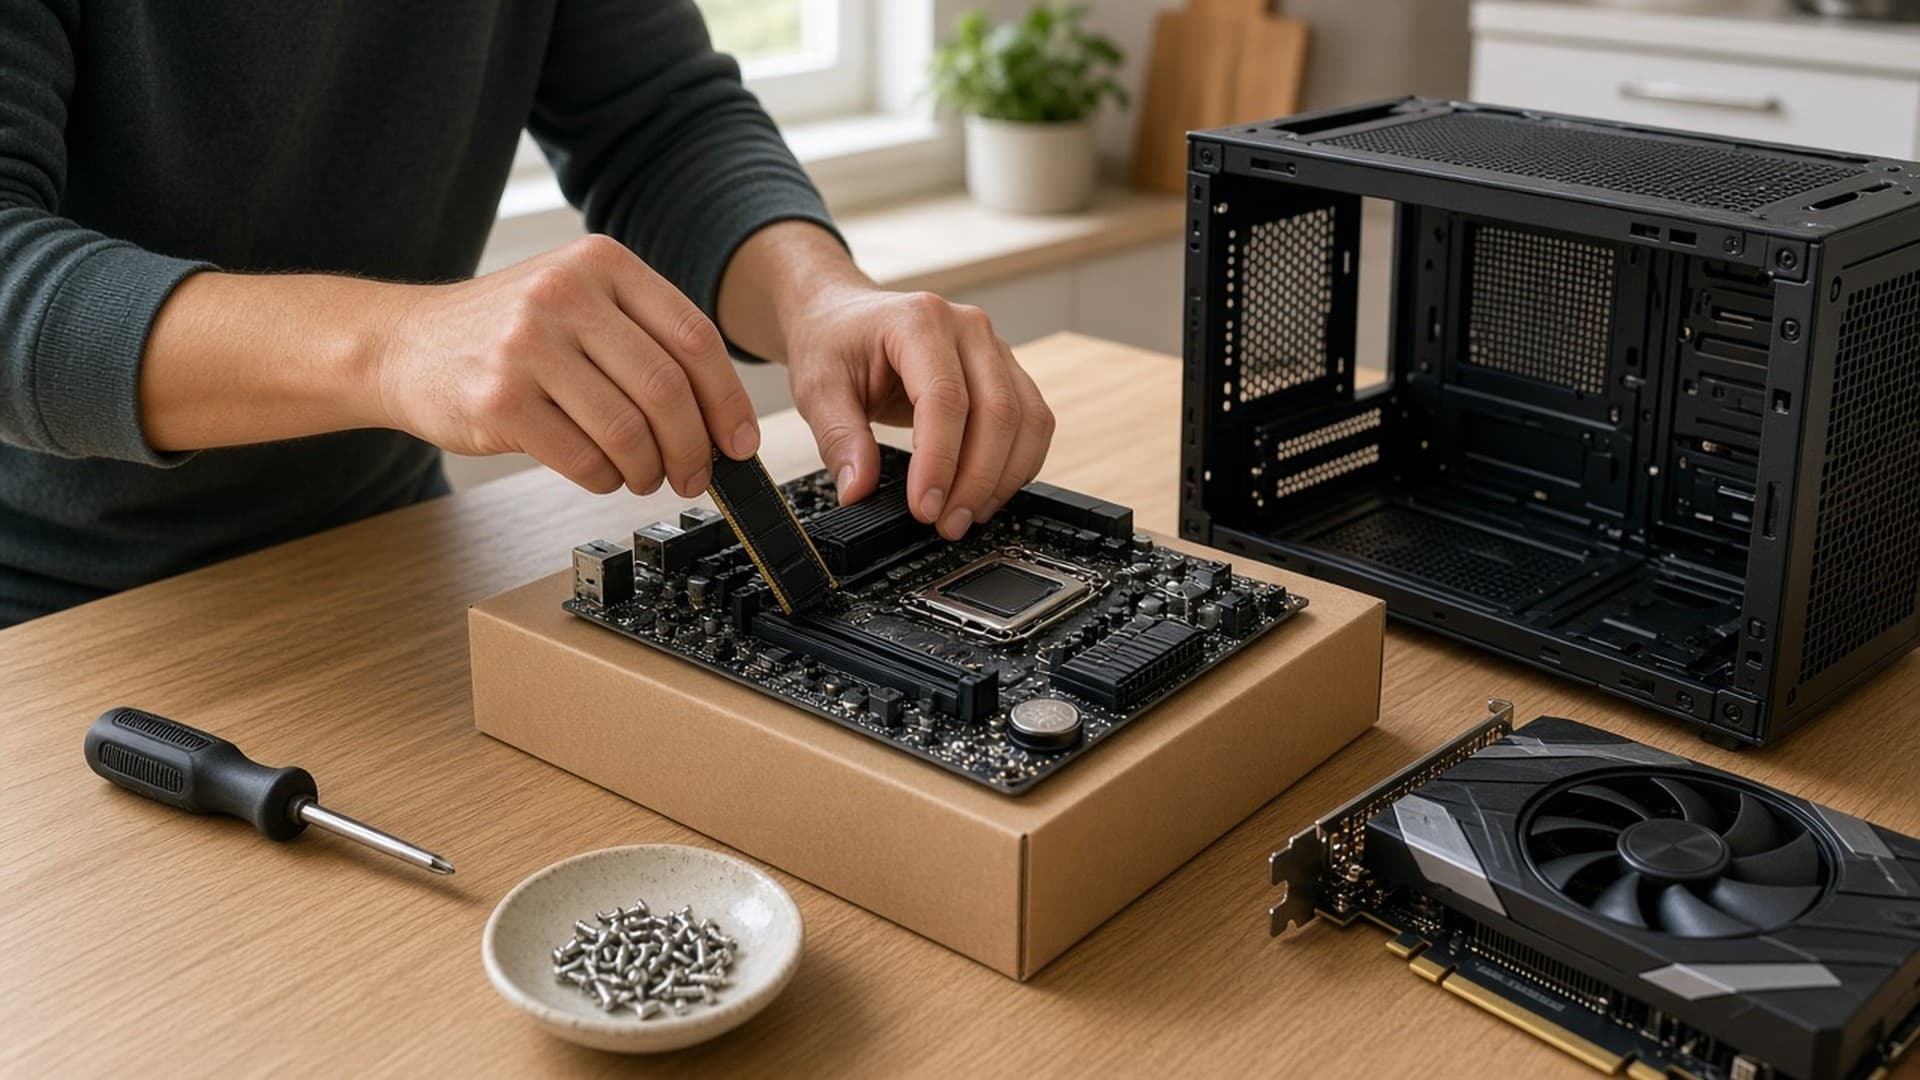
Most beginners find it easier to fit these parts with the motherboard lying on its anti-static bag on top of its box.
1. Install the processor. Lift the socket's retention arm. Line up the triangle marked on the corner of the CPU with the triangle on the socket, and lower the chip in without pushing. It should drop into place. Close the arm. On AM5 and Intel sockets the pins are in the motherboard, so be careful not to touch or drop anything onto them. On AM4 the pins are on the processor itself.
2. Install the M.2 SSD. Remove the M.2 heatsink if the board has one, and peel the plastic film off its thermal pad. Insert the SSD at a slight angle into the slot the manual recommends for your main drive (usually the one nearest the CPU), press it down, and secure it with the screw or latch. Refit the heatsink.
3. Install the memory. Check the manual for which two slots to use with two sticks. It's usually the second and fourth slots from the CPU, often labelled A2 and B2. Open the clips, line up the notch, and press firmly until the clips click.
4. Fit the CPU cooler. Follow the cooler's manual, because mounting kits differ. If the paste isn't pre-applied, a pea-sized dot in the centre of the CPU is enough. Remove any plastic film from the cooler's base. Plug the fan cable into the header marked CPU_FAN.
Step 4: Into the case
5. Prepare the case. Remove both side panels. Check that the motherboard standoffs (the small raised screw posts) match your board's size. Most cases come with them pre-installed for ATX.
6. Fit the motherboard. Many modern boards have a built-in I/O shield. If yours doesn't, clip the separate shield into the case first. Lower the board in at an angle so its ports go through the rear opening, line it up with the standoffs, and screw it down. Make it firm, not tight.
7. Install the power supply. It usually mounts at the bottom of the case, fan facing down if the case has a vented, filtered floor. With a modular PSU, connect only the cables you need: the 24-pin motherboard cable, the 8-pin (or 4+4-pin) CPU cable, and the PCIe cables for the graphics card.
8. Connect the cables before the graphics card goes in. It's easier while there's room:
24-pin motherboard power.
CPU power at the top left of the board. Some boards have two sockets, and the manual says whether both are needed.
The case's front-panel connectors (power switch, reset, LEDs) to the pin header in the bottom right of the board. These are the fiddliest bit, so use the manual's diagram.
The front USB 3 and USB-C headers, and HD audio.
Case fans to the SYS_FAN or CHA_FAN headers, and any RGB cables to the matching headers. ARGB headers are 3-pin 5V, and plugging into the wrong header can damage the lighting.
9. Install the graphics card. Remove the expansion slot covers on the back of the case to match the card's width. Push the card into the top full-length PCIe x16 slot until the latch clicks, then screw the bracket to the case. Connect the power cables firmly. If your card uses a 12V-2x6 or 12VHPWR connector, make sure it is fully seated with no gap.
10. Tidy the cables behind the motherboard tray so they don't block airflow or touch fans. Leave the side panels off for the first boot.
Step 5: First boot
Connect your monitor to the graphics card, not the motherboard's video outputs. Then plug in the keyboard and mouse, the UK power lead and switch the PSU on.
Press the power button. On an AM5 system, don't panic if the screen stays black for several minutes. An ASUS ROG forum guide explains that AM5 boards train the memory on first boot, which "can take anywhere from 5 to 15 minutes depending on the memory configuration and density". Don't interrupt it. Later boots are much faster.
If nothing happens at all:
Check that the PSU switch is on and the front-panel power switch connector is on the right pins.
Check the 24-pin and CPU power cables are fully seated.
Look for the motherboard's debug LEDs (CPU, DRAM, VGA, BOOT) or a Q-code display. The lit LED tells you which part to check.
Reseat the memory. This is the most common fix.
Step 6: BIOS settings
Press Delete (or F2) during start-up to enter the BIOS. Then:
Check that everything is detected: CPU, the full amount of memory, and your SSD.
Enable EXPO (AMD) or XMP (Intel) so the memory runs at its rated speed. Without it, DDR5-6000 will run well below its rated speed. On AM5, expect the system to retrain the memory after you change this.
Check fan curves if the system is loud.
Update the BIOS if the manufacturer's site has a newer stable version, especially if you have a brand-new processor. Follow the board maker's instructions exactly, and never switch off during an update.
Resizable BAR (called Smart Access Memory on AMD) may already be on. If not, turn it on. Intel says it must be enabled for optimal performance with its Arc A-series cards, and we would do the same for any current graphics card.
Step 7: Install Windows 11 and drivers
Windows 10 reached the end of support on 14 October 2025, according to Microsoft, so install Windows 11. Use Microsoft's Windows 11 download page on another PC to create a bootable USB stick, plug it into the new PC and boot from it. You can press F8, F11 or F12 for the boot menu, depending on the board, or choose the USB stick in the BIOS.
You need a licence to activate Windows. Microsoft's UK store charges £119.99 for Windows 11 Home. Budget for it, because none of our parts lists include it.
After Windows installs:
Install the graphics driver from AMD, NVIDIA or Intel.
Install the chipset driver from AMD or Intel, or from your board's support page.
Run Windows Update until there's nothing left.
Check the memory speed in Task Manager under Performance, then Memory, to confirm EXPO or XMP is working.
Buying parts in the UK: your rights
Buy from established retailers such as Scan, Overclockers UK, Box, AWD-IT, CCL or Amazon UK (sold by Amazon or a reputable seller). According to Citizens Advice, you usually have a 14-day cooling-off period for things bought online from a business, starting the day after delivery. Under the Consumer Rights Act 2015, you have 30 days to reject faulty goods for a refund. Keep your boxes until the system has been running happily for a few weeks.
Our verdict
Building a gaming PC in 2026 is very achievable for a first-timer, and it's still the best way to make sure your budget goes into the parts that matter. Spend most of your effort before the build: check that the platform matches, the parts fit and the PSU is enough. Then follow your manuals step by step. On first boot, be patient with AM5 memory training. Turn on EXPO or XMP in the BIOS, and install your graphics and chipset drivers before you start gaming. If anything goes wrong, it's almost always a cable or a stick of memory not quite seated.